Today I did the last bits of trimming gluing the last few pieces of vinyl down.
Then I rivited on the quaterlights and fitted the rubber seals.
Next it was time to fit the reas screen, after a few starter attempts I eventually figured out the best way using some cord to ease the rubber over the lip.
Now it is ready to have its plastic chrome finisher fitted
I warmed it up in hot water to make it more pliable.
All done
All the remains now is to open up the holes on the rear deck and place it on the car.
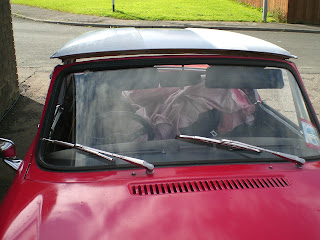
With the car jacked up on both sides and some gentle persuasion of the windscreen frame with my foot it is at last fully attached.
Monday, October 3, 2011
Saturday, October 1, 2011
Headlining
Been poorly this week, so nothing at all done until this afternoon.
Despite still feeling unwell, I just had to make some progress.
Being a tight arse, I again opted for the cheapo option of making my own.
Cost of pre-made - £70
Cost of self made - £30 plus the fun of actually doing it.
The first task was to unpick the old one into its seperates.
.
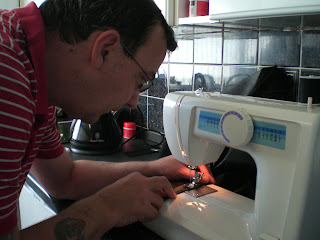
I then drew around these on the new cloth then cut them all out
Here is the action shot ^.^
Headlining in place, I added the front rubber
Then added the side rubbers.
Then I killed some glue waiting time by cleaning up the quaterlights.
Before
And after
Saturday, September 24, 2011
Top coat done
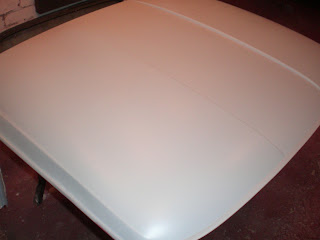
Today I finished the paint on the Hardtop.
Here are some shots of me in action and the hardtop right after spraying.
I need to buff this once its hardened then I can fit the headling and refit the glass and rubbers. I am quite please with how this is looking so far. Not perfect by any means but still looking nice,
Here are some shots of me in action and the hardtop right after spraying.
I need to buff this once its hardened then I can fit the headling and refit the glass and rubbers. I am quite please with how this is looking so far. Not perfect by any means but still looking nice,
Thursday, September 22, 2011
I've been a tad lazy this week
Laziness is a strong point for me lol, I struggled to find any motivation all week until this evening.
More filler more rubbing down and more primer.
I think it is just about ready for top coat now.
Time to think about ordering the headlining material me thinks.
More filler more rubbing down and more primer.
I think it is just about ready for top coat now.
Time to think about ordering the headlining material me thinks.
Sunday, September 18, 2011
Hardtop Almost There Now
This afternoon I worked more on the hard top, I decided to tackle the underside where the rubbers will seat, I wanted to paint these red prior to the rest of the top to make it easier when I do paint job proper. Once dry I flipped it back over and gave the roof a sand down and another coat of primer.
The photos show as it is after todays efforts.
Then I spent a little time cleaning out the garage.
The photos show as it is after todays efforts.
Then I spent a little time cleaning out the garage.
Hardtop Trial Fit
I decided it was time to trial fit yesterday so I could a) assess the alignments of both the roof and the car and b) whether or not to continue with it.
You can see from the next 3 photos that my windscreen is about 1 inch out on the drivers side and 1/2 inch out on the passenger side, either my roof is twisted or the car is and the bulkhead/windscreen has retracted a little or more likely, a combination of both.
I managed to get it fitted by sitting in the car and using my foot against the a pillar to push whilst pulling the front of the roof down. I think I may need some spacers under the tub and once I figure where I will have a go at that.
At least I now know that it will fit the car so can continue with the work.
Tuesday, September 13, 2011
Subscribe to:
Comments (Atom)


